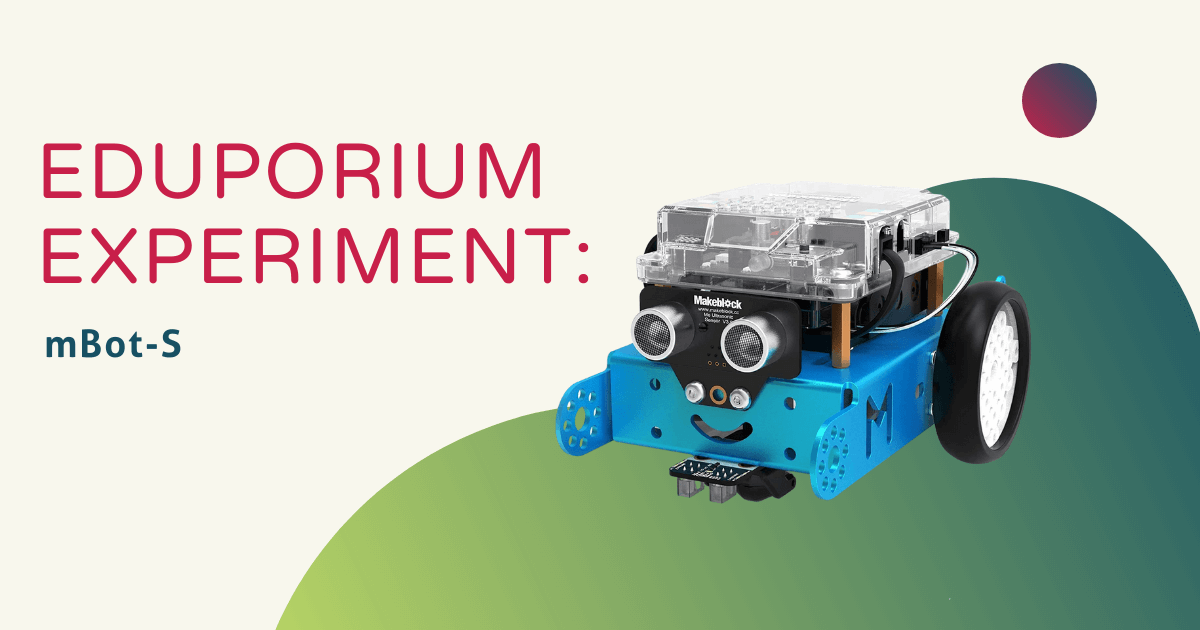
Integrating coding and robotics in the classroom is a popular and effective approach to offering students of all ages a real-world STEM education. It truly doesn’t matter how old students are or what types of experiences they’ve had with programming in the past since there are entry-level solutions to help ease them into learning new skills. One of these options is the mBot-S robot, a Scratch coding robot that's both engineerable and programmable for students in elementary, middle, or high school. As students progress through exploring with the mBot-S, they’ll learn some of the fundamental skills that robotics and coding experiences allow them to develop. So, how can educators go about teaching with it?
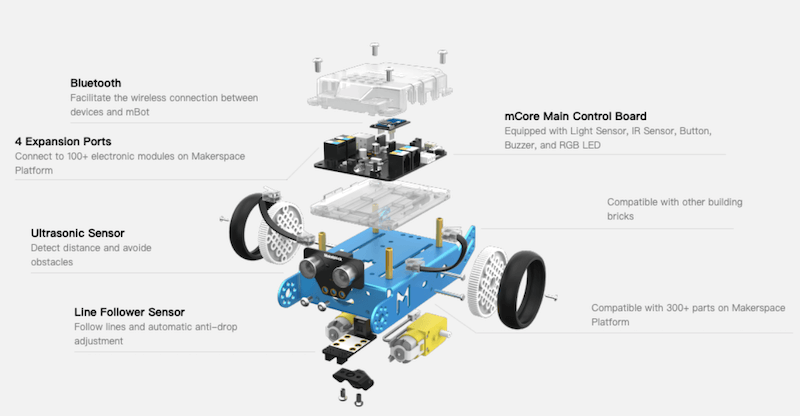
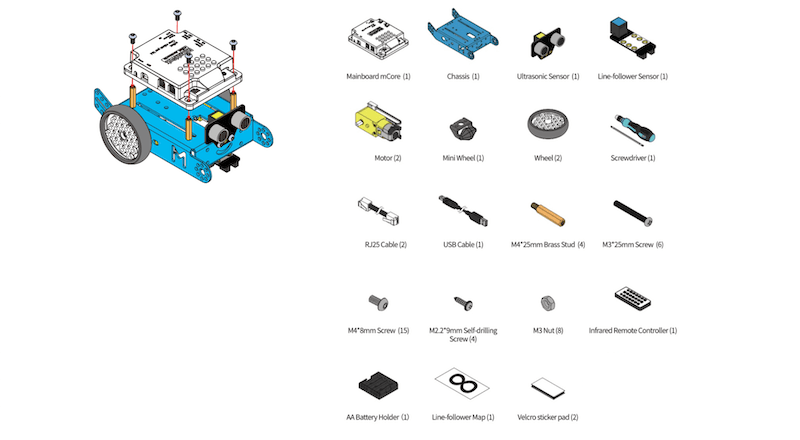
The mBot-S is the latest version of the mBot robot, following the original mBot models and joining some different robots in the Makeblock family. These include the mBot Ranger, mBot Ultimate, and mTiny among others. Using the mBot-S, students get to experience multiple areas of STEM learning, including, most notably, engineering and coding. The mBot-S comes disassembled, but it’s super easy and rewarding for students to put together. Step-by-step instructions are included in the box and all they need, in addition to the robot’s parts, is a screwdriver. This hands-on element helps engage them from the very beginning and also helps expose them to the hardware and electronics that comprise the robot’s build.

The main difference between the mBot-S and previous mBot models is the on-board LED matrix that comes with this newest version. Using Makeblock’s various applications and their programming skills, students can create code that displays unique messages on the matrix! It’s designed to be simple enough for students as young as eight years old to use in experiential learning with the mBot-S as they animate customizable images and program the robot’s LEDs. Plus, the mBot-S makes a great introductory to robotics tool for elementary students in part because it can be programmed using visual, block-based programming.
It can be programmed using the mBlock Blockly, Makeblock, or mBlock apps. The mBlock Blockly and Makeblock apps are supported on iOS and Android devices while the mBlock app is a desktop environment that’s supported on Windows and macOS devices. The mBlock platform is completely block-based, the Makeblock app is an all-in-one robot controller, and the mBlock Blockly app is a game-based programming app. For the best mBot programming experiences, especially for new coders, it can be beneficial to utilize one of the mBot’s three pre-set modes. These include obstacle avoidance mode, line follower mode, and manual control mode. In obstacle avoidance mode, the mBot will navigate around any obstacles in its path. In line follower mode, it will travel along lines on the ground. And, in manual control mode, students are able to control its movements in real time.
The Makeblock app is the best place for students new to the mBot to begin. This app is designed to help them move through the robot’s various capabilities by playing and experimenting with the different controls. Within the Makeblock app, students can control the mBot-S with the remote-control driving function, voice control, or the “Draw and Run” function. It also includes the Makeblock Bluetooth Controller, which allows students to pair their device with their mBot and control its movements using 15 various buttons and two joysticks. As a beginner level option, this app is designed to help younger students build confidence when it comes to robotics and programming.
Then, we have the mBlock Blockly app, which is designed to give students a gamified learning experience. As the name implies, mBlock Blocky involves block coding and students can simply drag and drop the blocks they need into their programs. The mBot then responds to the commands and students can complete various game-based tasks as they learn new coding skills in the process. Then, we have advanced programming with the mBot, which can be done using the mBlock app. This offers a similar experience to mBlock Blocky, but students can then switch from block coding to text-based programming in the Arduino C language to continue building their computer science skills.
As we mentioned and like other mBot models, the mBot-S comes in pieces and with the tools for students to assemble it themselves. Each of the electronic components is color coded to make it easy for students to connect to the appropriate pieces and the building manual features very detailed, three-dimensional illustrations for kids to follow as they build. As a byproduct of building the robot, they also get the chance to develop their spatial awareness and increase familiarity with robotic parts and sensors. We’ve always thought this was a great way to give them some engineering practice before getting into the programming side of things once the robot is built and this continues to be a great feature from of Makeblock’s STEM solutions!

After building the mBot-S, which takes a little less than a half hour, students can move on to the programming! I had my iPhone handy, so I decided to give the mBlock Blockly app a try rather than the Makeblock app with the intention of saving the desktop mBlock version for another time. To get started, students can simply select the mBot option when the app opens and then select the first challenge (the only one that’s unlocked when they first get started), which is called ‘Sequence.’ The app provides some basic instructions and reminds the user to make sure their mBot is connected (via Bluetooth) and then you’re able to access the programming field and different blocks that can be used to build programs.
Creating programs within the Blockly app is similar to using other Blockly programs and as easy as connecting the robot and connecting different blocks by dragging them together. As soon as I had a program that was about eight blocks long, I figured that was a good start, so I hit the play button on the screen and the mBot ran the program pretty much exactly how I had hoped. It was quite smooth for a robot that I wouldn’t really hesitate to describe as bulky and this is great to know for educators who are using it in the classroom or even in remote learning. Some of the blocks in my program included those that told the mBot to start moving when the play button was clicked, to light up different colors, and to briefly pause at one point.
There are also various add-on kits for the mBot available on our store to help make inventing and coding with the mBot-S more exciting and engaging for students, especially those who may have completed some of the initial challenges with ease. With the add-ons, students can design and complete a variety of projects, like a dancing cat, head-shaking cat, light-emitting cat, and more. You can find the add-ons and accessories on our store by searching for ‘Makeblock.’
Though it is slightly challenging to build the mBot-S, the programming opportunities it provides for students are great! The mBlock Blockly app is very engaging and quite easy to navigate, allowing kids to enjoy a hassle-free programming experience. To order an mBot-S, request a quote, or to check out the other various Makeblock items we provide at discounted prices for educators, head to our store! And, be sure to follow us on Twitter and Instagram more info on all of the best technology tools to use in K-12 remote or in-person STEM learning!


