So, you spent the whole summer planning and planning and now have tons of innovative ideas for student makerspace projects. You’re even hoping for rainy days so students spend time innovating in your maker lab, taking advantage of this opportunity. There’s just one small problem remaining. There’s nowhere to put it. Makerspaces are very versatile, however, so if you’re struggling with finding the right place for it to go in your school (or any place), it shouldn’t bee too much of a challenge and here are some helpful hints!
The Computer Lab
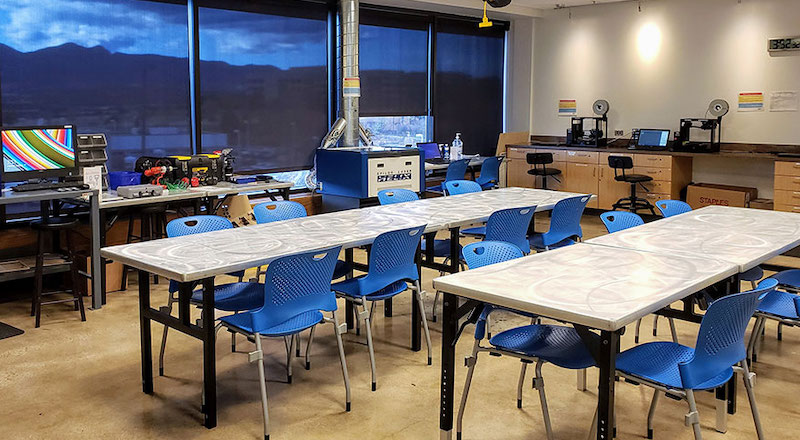
Many teachers are turning away from traditional computer labs and focusing more on maker-minded areas in these spaces. One of the most popular switches we see is converting computer labs into 3D printer labs, which enables students to use more relevant technology, engage in design thinking, and creatively sculpt objects they can then use in problem solving. Computer labs are great places to put makerspaces because they have many things kids need for inventing. Things like power, Internet access, computer programs, and the ability to research are super important in makerspaces and repurposing older computer labs could help teachers incorporate them.
Another reason why computer labs are logical places to construct makerspaces is that they're all generally fairly sizable. Most school computer labs hold 20-30 computers, giving students the chance to work in the same place at once. The same logic is applicable for makerspaces. If all the computers, tables, and chairs were removed, however, think of the added space for inventing and collaborating. This could be especially appealing if any old computer labs have huge desktop computers rather than flatscreens or laptops. Heck, taking apart these giant machines (as long as you’re done with them) could be a great makerspace project.
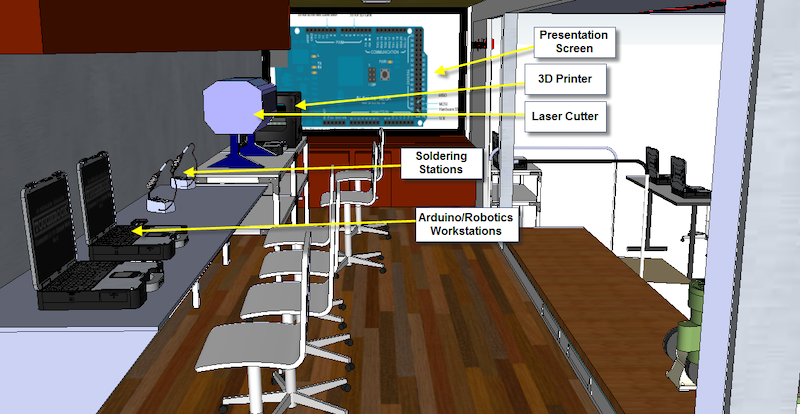
Depending on your time and your physical and monetary resources, computer labs offer a couple different values for makerspace-building teachers. If time and money aren’t huge factors, you can strip down old computer labs and rebuild them from scratch so that kids can come in to a brand new space that is ready for making. If that’s tough (and we understand), keeping some walls and shelves intact can also create an environment for advancing making. These are good places to store supplies, hang shelves, and students can even design them, themselves. Then, once the physical preparations are complete, you can visit the Eduporium store to stock it with all the rest of the makerspace supplies you’ll need.
The Library
We truly understand that some school leaders may be skeptical of putting a makerspace right smack in the middle of their school’s library, especially if they use their library in certain ways throughout the school year. The good news is that it’s not impossible to create a makerspace and keep the traditional library intact. The best makerspaces afford kids with lots of creative freedom and help them create fluid learning experiences. They should be able to use them when it's convenient to come in and spend some time tinkering. In school libraries, however, this isn't always efficient but teachers can team up with students to make it work.
One way to combat this issue is adding new maker elements to common library projects instead of having students focus only on the makerspace part of the room all the time. This allows them to use the library for its intended purpose but also add a splash of maker education just to make things a bit more interesting. Another way to combine the two is to make making more like a story. Teachers can create storybooks that help students learn about the key elements of a story while also showing them how to make a much more unique project using a handful of selected makerspace materials. Not only will this combine literacy and maker learning, it helps boost student engagement and, ideally, lead to greater retention.
Perhaps another reason that makerspaces have found homes in school libraries is because MakerEd helps kids create stories. When in libraries, students are often inspired by the books they read and the messages they learn. With the makerspace now in the same place, they can harness their creativity right when they're inspired and make something memorable. Allowing students this opportunity to be creative could hopefully pave the way to making makerspace time more structured. So, with each project children create and every piece they connect, students are building design and creative skills, which is exactly what they need out of their library makerspace—the opportunity to roll up their sleeves and make something out of anything.

The Cafeteria
Makerspaces promote versatility and educators who design them learn to adapt to changing conditions in their environment. Yes, even if those conditions include old food and cartons of milk. Aside from the actual lunch periods, the cafeteria is actually a somewhat viable location for your school's makerspace as long as everybody involved adopts the attitude of making the best of their situation and embraces the likelihood of having to make changes on the fly fairly regularly. Cafeterias do have things going for them as it pertains to serving as the temporary or permanent home for makerspaces. For starters, they are generally some of the biggest rooms in the school, already have a bunch of tables for collaboration, and no one will get too upset if students go a little over the top with their creativity and make a mess.
You know what else there is a lot of in your school’s cafeteria? Trash! Don’t worry, we’re not talking about digging through the trashcans to find some old pasta for making macaroni art or encouraging students to construct murals out of heaps of garbage. There are some things, however, that they can use to construct innovative maker projects. Thankfully, most of those things are recyclable materials that you could always clean before students use them in these projects. Think about how many milk cartons, water bottles, and other inconsequential objects students discard on a daily or weekly basis. A lot of them are reusable and enable students to create sculptures and devices during their time in the makerspace. Teachers can even combine MakerEd with a green initiative and encourage kids to creatively practice and promote recycling.
Of course, using the cafeteria as a makerspace during the school day could get problematic at lunch time, especially if you’re using some larger tools, like 3D printers and must move them around to accommodate. The obvious way to work around that is to not use 3D printers if students are making in the cafeteria. Or, if you’re like us and want to ensure your students are getting the best makerspace experience, you may opt to go with some smaller models and set up a small enough table far enough out of the way so that they’re not creating an inconvenience while students are eating and nobody is tempted to mess with them during the lunch periods. There are also other ways to get students making in a makeshift makerspace using the same tools from the classroom.
The Closet
Okay, now bear with us a little bit on this one. We probably don’t need to tell you that a closet isn’t an ideal place for a makerspace but it is just a long shot option if you have nowhere else to go. We don’t mean one of the nice standard-sized walk-in closets or tiny kitchen closets, either. Some schools—and, unfortunately, yours may not be one of them—have some big, old closets sprinkled in random places throughout the halls or maybe near the basement of wherever. There actually used to be one in the library of my old school. The point is that they are sometimes quite spacious and could provide students with enough room to store and use a 3D printer, a carving machine, or other makerspace products. Their first project might even be finding a creative way to make learning in this tight space work.
To be perfectly honest, their first project might also be cleaning these old closets out. There’s also a pretty good chance it’s filled with old desks, chairs, gym equipment, boxes, and you name it. Some of this stuff could be useful in your makerspace, however. If you can fit tables in this makeshift makerspace and have spare room for chairs, this could be an option. Ideally, you would want some 3D printers that work with a laptop, which thankfully most do, so that there’s no need to set up a desktop computer in this already very small space. That would probably create more work than it’s worth. As long as there’s light and electricity, these old supply closets can still serve students in the modern Maker Movement.
Who knows, the small size might make it look like it’s creating huge demand with kids overflowing from the closet. In all seriousness, though, it often takes a bit of creativity and determination to launch makerspaces in some schools but the persistence can be worth it in the end. That old closet makerspace could very well serve as a stepping stone to committing to setting aside a different space in the following school years and then maybe even building a true makerspace a couple years later. The important thing is that makers need to have some ingenuity when it comes to their designs and creations. So, getting creative when it comes to using every square foot is just another challenge they can overcome.

Mobile Makerspaces Can Go Anywhere
There’s no rule that says your makerspace needs large pieces of technology and powerful equipment. The term ‘makerspace’ is very much open to interpretation, especially the ‘space’ part. We have even heard of teachers bringing their makerspaces into school hallways because student projects are often portable and adaptable. And, we say hey, if you have the determination to make it work, then there’s nothing wrong with that! The hardest part is probably transporting supplies from one place to another and, as long as students have enough room to lay them all out, they’ll get just as much out of making in the hall as they would when making in the classroom, library, or cafeteria.
So, what makes a makerspace mobile and allows you to pack up and relocate to the hallway or anywhere else? It basically comes down to the size of the tools students are using plus their portability. Presumably, students are using a lot of cardboard, scissors, glue, tape, and things like that on their typical makerspace days. All right, no real problems when it comes to transporting these materials (just don’t run with scissors, please). We love it when they design race tracks for the Sphero Mini or BOLT, too, since these robots are mobile. So are the devices they use to control them. While considering the portability of STEM tools you’re thinking about purchasing for your makerspace isn’t necessarily something we’d consider a requirement, it is nice when you do have that.
We commonly refer to makerspaces that you can set up anywhere in the school as ‘mobile makerspaces.’ We mentioned the hallway but, if you're using this kind of makerspace, you might need a few possibilities. Some other ideas include the teacher’s lounge, nurse’s office, gym, and even outside! The playground can house a temporary makerspace, especially if you are studying some outdoor or environmental concepts at the time. Makerspaces are all about inspiring creativity in children and it doesn’t matter where they do their making. All that ultimately matters is students experiencing creative making and experimentation while they collaborate, innovate, and build key skills.
For the latest EdTech, STEM, and 21st century education news, follow us on Twitter and Instagram. Like us on Facebook, too, or sign up for our newsletter for our latest product announcements and offerings. If you have an idea for an Eduporium Weekly theme, send us a message on social media or comment below.


