In this era of innovative education, there are plenty of buzzwords tossed around. Some trends fade out just as quickly as they appear and others stay around for the long haul. One of those that seems like it'll be part of 21st century learning for a long time is maker education. MakerEd often involves embodying many of the tenets from the Maker Movement and empowering students to design solutions, create collaboratively, and fail productively. And, since those values of maker learning are closely connected to 21st century learning experiences, the popularity of school makerspaces continues to remain high. So, when it comes to starting a makerspace in your school, what are the most important things you need to know?
Starting a Makerspace for Beginners
The great thing about makerspaces is that anything can help educators create productive STEM learning experiences. There's no one structure for creating the best makerspace. Makerspaces serve as creative workshops and collaborative communities for makers of all ages to turn ideas into tangible designs—often geared towards solving a specific community problem. Makerspaces are even found within many types of places, including libraries, community centers, and, of course, schools. When starting a makerspace, K-12 leaders, curriculum coordinators, and technology specialists may all work together or it may fall on another faculty member with availability. In any case, the first thing you might address is often 'Where do I start?'
Key elements to decide on when starting a makerspace.
Especially for someone new to maker education, an important first step is to do some research. It can be valuable for educators to learn more about the latest trends in makerspaces and educational implications before beginning the process of designing one in their school. This often helps them identify makerspace equipment they might want to include and get ideas for projects for students to work on. After developing an idea of what the makerspace might entail, the next step is to settle on a location. Depending on a lot of different factors (availability of funds, number of students, number of faculty members, type of equipment, expansion goals, etc.), every educator's needs will certainly vary. But, remember that school makerspaces can start as small as the corner of a classroom or take up an entire library.
Makerspaces and student learning.
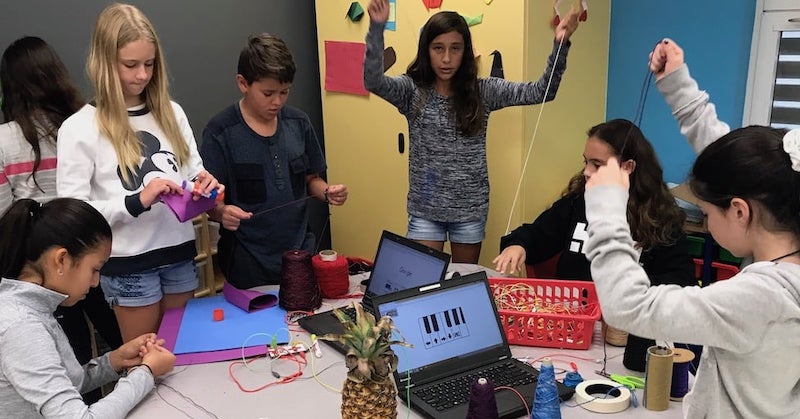
When it comes to makerspaces, teachers may also need to connect student learning experiences to the curriculum. This isn't necessarily a requirement, however. Some school makerspaces are only available for personal experimentation after school as opposed to a graded part of the education experience. Typically, distancing makerspace experiences from learning requirements frees up some creative experimentation without the added pressures of grades, projects, or deadlines. And, they may accomplish a whole lot more in terms of creativity with the right support and the proper tools. Whether it's circuitry kits, old egg cartons, simple electronic components, or any of the thousands of other materials used in makerspaces, they could certainly inspire students to turn their ideas to a reality.
What to Bring Into Your Makerspace
There's no recipe for starting a school makerspace but there are plenty of successful examples to study. Once they have a plan and mission for advancing student creativity and freedom of expression, educators can start gathering some resources. The budgets allotted for a school makerspace, however, will likely be fairly thin. In fact, they may only cover purchasing a few things, like 3D printers, so educators often have to make these funds count. And, to acquire additional items needed for innovation, they typically have to get creative. Makerspace teachers routinely request community help in this regard. Whether it's rounding up old cardboard, acquiring donations of maker supplies, or finding various old materials for upcycling or repurposing, chances are someone is getting rid of something that would make a great makerspace tool.
The right materials and the right messages.
People throw away useful makerspace materials all the time. That includes parents, school colleagues, and students themselves. One strategy could be setting up a separate recycling station in your school, allowing everyone to place materials that could be upcycled in there. It's also a great way to create buzz and spread key tenets of the Maker Movement. Along those lines, taking advantage of your maker community is also helpful. There are makerspaces and communities in almost every major city, which could help educators in various ways. These people could come in for demos, talk about their experiences, and inspire students to use maker tools for good. And, this helps students develop their own maker mindset and see all the good they can do through maker projects as well as how they can impact the world beyond their school.
Design challenges when starting a school makerspace.
In addition, regular themes and routines can help educators create a culture of ingenuity and a community of like-minded makers. Though they are, of course, still younger students, there's no reason they can't buy into this cooler way of thinking. One way to build camaraderie among students is by leading regular design challenges. These types of experiences help them move beyond simply designing the coolest projects. It's more about which individual or team can design a helpful solution with a lasting real-world impact, which is what maker education is all about. Plus, extending design challenges school-wide can simultaneously help in developing a school maker community. And, this helps in taking makerspace experiences up to that next level—showing students what's really possible through making.

Other Helpful Makerspace Design Tips
When starting a makerspace, it could be natural to spend energy finding the coolest technologies. In many cases, however, it's usually best to focus on developing and highlighting the physical characteristics of the makerspace. Some of these may, in fact, be small but others can have a major impact on student MakerEd experiences. Let's start with accessibility. In an era in which we focus so much on equity in education, it's become even more prominent in maker education. With this sense of community being such a large part of the Maker Movement, educators can't simply devote less attention to it because it's younger students who are involved. Designing a space that's completely accessible and filling it with maker tools that are equally effective for students of all abilities and skill levels is very important.
Stay flexible and minimize waste.
Something else to consider is the flexibility of working areas within the makerspace. These areas can each end up being unique and spread around depending on how much space you can use. Since students often work on different projects, the environment should be versatile and conducive to everyone's needs. There's also no reason to bring in materials and items they won't use. If it's being ignored and wasting makerspace space, then they can most likely just remove it. Makerspace learning is all about maximizing resources and relying on as few as possible. There's even also some additional resources that student makers may need, like electricity. Educators will have to figure out how to provide enough power, avoid electrical issues, and likely implement extension cords or other creative measures to run some of the makerspace tech tools.
Including the right supplies for your students.
Finally, to design an inclusive makerspace, teachers should try their hardest at setting things up to promote collaboration. From there, you can focus on smaller details, like setting up a recycling station, a cardboard repurposing station, or an investigation station (there can really be 'stations' dedicated to almost anything). With the right tools, collaboration and purposeful invention should then fall right into place. Other things to consider are basic supplies, like scissors, pencils, rulers, and other common classroom materials. You may also need maker supplies like paper towels, wipes, paper, and storage bins to keep everything organized. Check out any makerspace guide you come across as well for tips on more things you may overlook. The link in the previous sentence contains tips for starting a makerspace in a school library, specifically!
The Teacher's Role in a School Makerspace
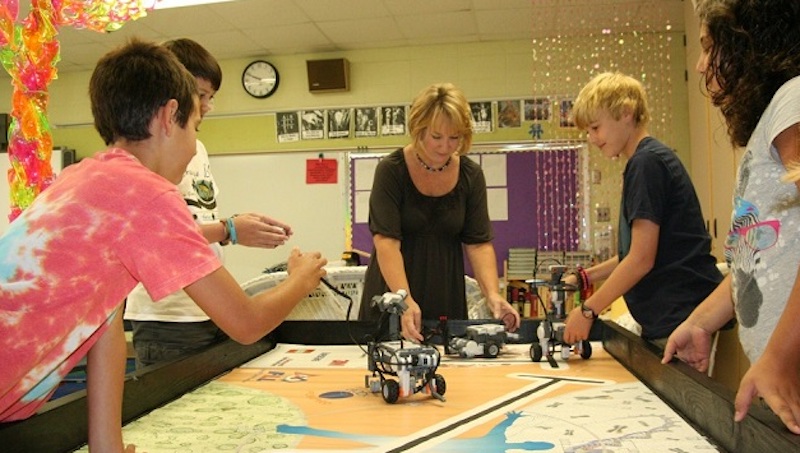
We've covered some of the things educators can do to prepare for bringing new MakerEd experiences to their students. That work, of course, does not stop once the makerspace is open for them. While most of the planning will take place beforehand, students still need a knowledgeable guide in case they need help. With that said, however, makerspace experiences provide students with freedom to create and fail. They'll learn just as much from doing something the wrong way as they do from doing it perfectly at first. This is a key cog in the development of their creativity and ingenuity. So in many cases, teachers like staying out of the way and only offering added motivation should students need it or praise when they achieve success.
Working with other teachers.
As students start using a school makerspace regularly, teachers should be able to pick up tendencies and trends. Sharing this information with other teachers in their school can be valuable. With a growing number of educators now on the same page, they can relate some of the makerspace experiences students have to what they're doing in their other classes. This goes for hyping up the makerspace as well. It also helps if other teachers in the school know how to describe the opportunities students will have. Some of them may be reluctant to give it a try but this is a chance to sell the opportunities for building, tinkering, investigating, and even breaking things. Most importantly, everyone should understand that the makerspace is generally a rule-free place for invention, togetherness, and discovery.
What to do after starting a makerspace.
Each day in the makerspace could be totally different for each student. Some might be working on a quick project while others might need a few weeks or months to wrap up their efforts. In any case, embracing the fact that different students may be working on different things is important. Like we said, teachers will often monitor students from afar during most lessons. If students are utilizing powerful equipment, however, they may need to monitor them more closely. But while they're observing, teachers can also feel free to facilitate collaborative opportunities for students. Whether it's a technology-focused project or something with more artistry, students can work together in many areas. It often just comes down to setting the stage, providing some inspiration, and letting them get to work.

Final Elements to Consider When Starting a Makerspace
We've covered a lot and, though some may seem like basic suggestions, they're still important. Especially for teachers who are new to makerspaces, knowing what to expect and how to pivot if necessary are each valuable. The design and functionality of your makerspace can take any number of directions. The biggest thing to remember, however, is to make the space as inviting as possible. This will be a new experience for many students and including things they recognize can make them feel more comfortable. If it looks like a place they could have fun and feel safe, more students are likely to get excited. It's not unlike a classroom and bright colors along with comfortable furniture can really help with that first impression.
Staying organized in the makerspace.
Makerspace experiences often involve students developing technical skills but also building key soft skills. Besides bolstering competencies, like collaboration, communication, and self-expression, kids will also get the chance to learn about organization. Oftentimes, they may have tons of different ideas for some projects they’d like to complete, which is great. Organizing them all then tackling them in a logical order, however, is often the ideal course of action. Organization also comes into play when cleaning up and keeping the many supplies in a makerspace easy for everyone to find. It takes everyone to keep makerspaces organized—a collaborative effort underscored by the sense of community associated with the Maker Movement.
Focusing on what will help students most.
There are a lot of tools students could use in the makerspace depending on their age and availability. This means it's important that makerspace leaders are familiar with how certain tools work as well. They should also be comfortable with safety insights to ensure no issues arise with students. Besides that, kids may not always finish their projects in one sitting and might need somewhere to store them. Creating an area where they can leave in-progress projects is something that many makerspace teachers find helpful. Finally, many makerspaces feature an area for brainstorming that's separate from where student making happens. If this is feasible given the size of your space, it's worth trying to get students to use it for this purpose.
If you are interested in starting a makerspace in your school or library and need some insights or guidance on what to expect, features to focus on, and MakerEd tools to acquire, we'd love to help. Our makerspace experts would be happy to set up a discussion to learn more about your vision. Please feel free to contact us any time to set up a conversation. Also, for the latest EdTech, STEM, and 21st century education news, follow us on Twitter and Instagram. Like us on Facebook, too, or sign up for our newsletter for our latest product announcements and offerings. If you have an idea for an Eduporium Weekly theme, send our team a message on social media or comment below.


